Low Interaction Honeypots with Python
Protecting a network can be a difficult task even for experienced security professionals. Even if you follow a strict patch management process, deploy an IDS/IPS solution, run antivirus on all your hosts, and regularly monitor logs and events, there is still always a chance that a skilled attacker could breach your network. Even worse, a careful adversary could potentially remain undetected for a long period of time. There are no shortage of security solutions out there promising to offer the highest level of protection, but realistically any security control can be bypassed under the right circumstances. So what are we to do?
Ensuring that we can detect and respond to a breach as soon as possible is critical to any good information security strategy. One of the simplest ways we can do this is to turn an attackers methodology against them with a honeypot!
What is a honeypot? Why deploy one?
In short, a honeypot is defense by deception. It is a program intended to simulate common network services, pretending to be “low hanging fruit” on a network.
Honeypots are something a normal user would NOT typically interact with. When an attacker gains a foothold on a network, they will often enumerate targets inside the network for services that they may be able to explore. By running a honeypot inside the perimeter of our network, we can monitor it for activity. We can hopefully catch the attacker early on into the breach, and respond before any real damage is done!
A simple low interaction honeypot written in Python
The honeypot I am going to demonstrate is far from advanced. We will not be using it to capture any malware, or identify zero-day exploits. If you are looking for a robust solution to deploy in a large production network, I implore you to explore one of the many projects recommended by the Honeynet Project.
This example is sufficient for a small network with minimal resources. The honeypot is less than 50 lines of Python code, and can run on any linux distribution with Python 2.7 installed. The honeypot does nothing more than listen for connection attempts, and echo them to a remote log server. The log server is configured to alert us when activity is detected so that we are made aware that a breach has occurred.
Why write our own? Why not use an existing honeypot?
Lets get the obvious out of the way. Honeypots are nothing new. There are plenty of honeypot projects out there to pick from. Many are free and open source. There are low/medium/high interaction honeypots, research honeypots, production honeypots, pure honeypots, spam honeypots, malware honeypots and more. Why even bother writing our own?
Well…because we can…very easily! Creating something on your own is a great opportunity to learn something new!
The honeypot source code
You can find the source code on my GitHub page here. For convenience, I have included it below as well:
import socket
import atexit

# Local IP/Port for the honeypot to listen on (TCP)
LHOST = '0.0.0.0'
LPORT = 23

# Remote IP/Port to send the log data to (TCP)
RHOST = '192.168.1.210'
RPORT = 9000

# Banner displayed when connecting to the honeypot
BANNER = 'Ubuntu 14.04 LTS\nlogin: '

# Socket timeout in seconds
TIMEOUT = 10

def main():
    print '[*] Honeypot starting on ' + LHOST + ':' + str(LPORT)
    atexit.register(exit_handler)
    listener.setsockopt(socket.SOL_SOCKET, socket.SO_REUSEADDR, 1)
    listener.bind((LHOST, LPORT))
    listener.listen(5)
    while True:
        (insock, address) = listener.accept()
        insock.settimeout(TIMEOUT)
        print '[*] Honeypot connection from ' + address[0] + ':' + str(address[1]) + ' on port ' + str(LPORT)
        try:
            insock.send(BANNER)
            data = insock.recv(1024)
        except socket.error, e:
            sendLog(address[0],'Error: ' + str(e))
        else:
            sendLog(address[0],data)
        finally:
            insock.close()

def sendLog(fromip, message):
    s = socket.socket(socket.AF_INET, socket.SOCK_STREAM)
    s.connect((RHOST, RPORT))
    s.send('IP:' + fromip + ' Port:' + str(LPORT) + ' | ' + message.replace('\r\n', ' '))
    s.close()

def exit_handler():
    print '\n[*] Honeypot is shutting down!'
    listener.close()

listener = socket.socket(socket.AF_INET, socket.SOCK_STREAM)
if __name__ == '__main__':
    try:
        main()
    except KeyboardInterrupt:
        pass
How does it work?
The code above should be pretty simple to understand if you’ve ever worked with Python. There are 6 variables to configure in this script which will determine how the honeypot behaves.
LHOST - This is the local interface IP the honeypot will listen for connections on. Using ‘0.0.0.0’ will tell the program to listen for connections on all available interfaces. Change this value if you wish to bind to a specific interface.
LPORT - This variable specifies the port the honeypot will listen for connections on. You will likely want to choose the port of a common network service such as Telnet (23) or FTP (21).
RHOST - This is the IP address of the remote log server which we will be echoing the connection attempts to.
RPORT - This is the port that the remote log server will be listening on.
BANNER - This is the banner which the honeypot will transmit when a user tries to connect to the LHOST:LPORT defined above. The idea is to choose a banner that is used by a common network service. This way any enumeration done by an attacker will indicate a potentially vulnerable/lucrative service, and entice them into connecting to it. You can find appropriate banners to use by searching online, looking at nmap signatures, or capturing the network traffic of legitimate services. I will give a few examples below.
TIMEOUT - This variable sets the connection timeout value in seconds when an attacker connects to the honeypot. This can be useful to prevent empty TCP connections from tying up the honeypot.
Lets take a look at the current variable configuration and break down what is happening:
# Local IP/Port for the honeypot to listen on (TCP)
LHOST = '0.0.0.0'
LPORT = 23

# Remote IP/Port to send the log data to (TCP)
RHOST = '192.168.1.210'
RPORT = 9000

# Banner displayed when connecting to the honeypot
BANNER = 'Ubuntu 14.04 LTS\nlogin: '

# Socket timeout in seconds
TIMEOUT = 10
For our initial demonstration, the honeypot will be bound to all interfaces (0.0.0.0) and listening on port 23, a port commonly used for the Telnet service.
It will transmit any user interaction to our log server at 192.168.1.210, which is listening for TCP connections on port 9000.
The banner we are using is the banner used by the Ubuntu 14.04 telnet server, this is a clear text service that an attacker may be inclined to attack if discovered.
We have configured any connection attempts to timeout after 10 seconds.
Running the honeypot
For this demonstration we will be running the honeypot on a Debian Linux installation. We will need to be logged in as the root user (or use sudo) to launch the honeypot in its current configuration. This is because we are attempting to bind to a port lower than 1024, which is not typically allowed by low privilege users. Launch the honeypot in your terminal with the following command:
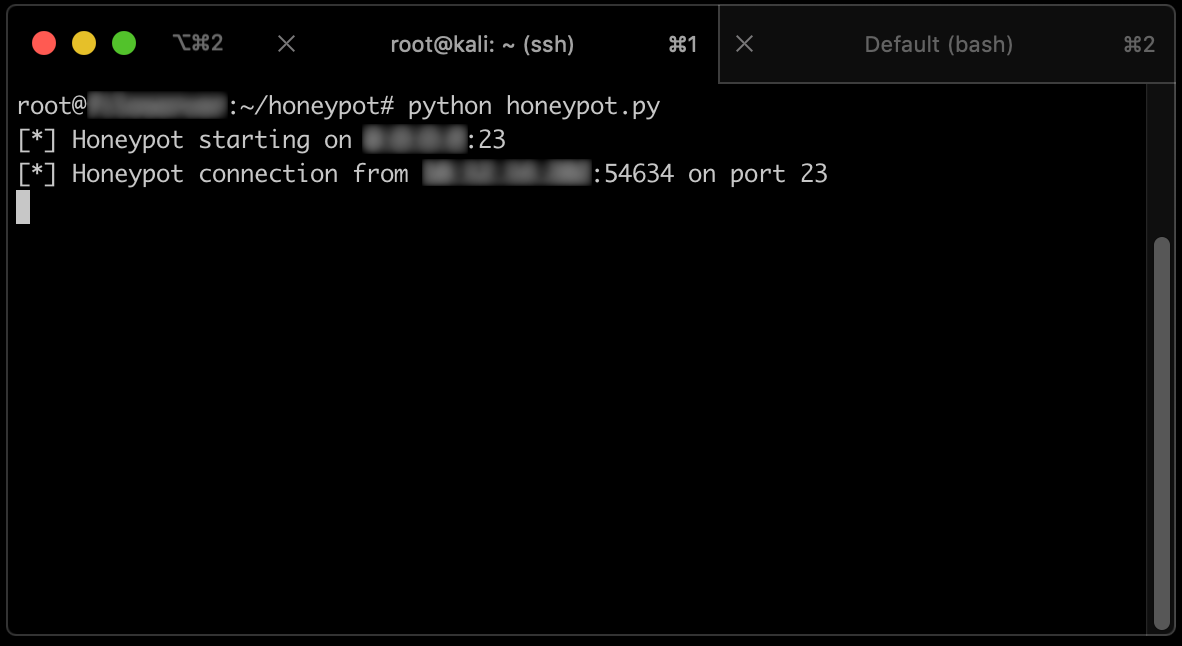
python honeypot.py
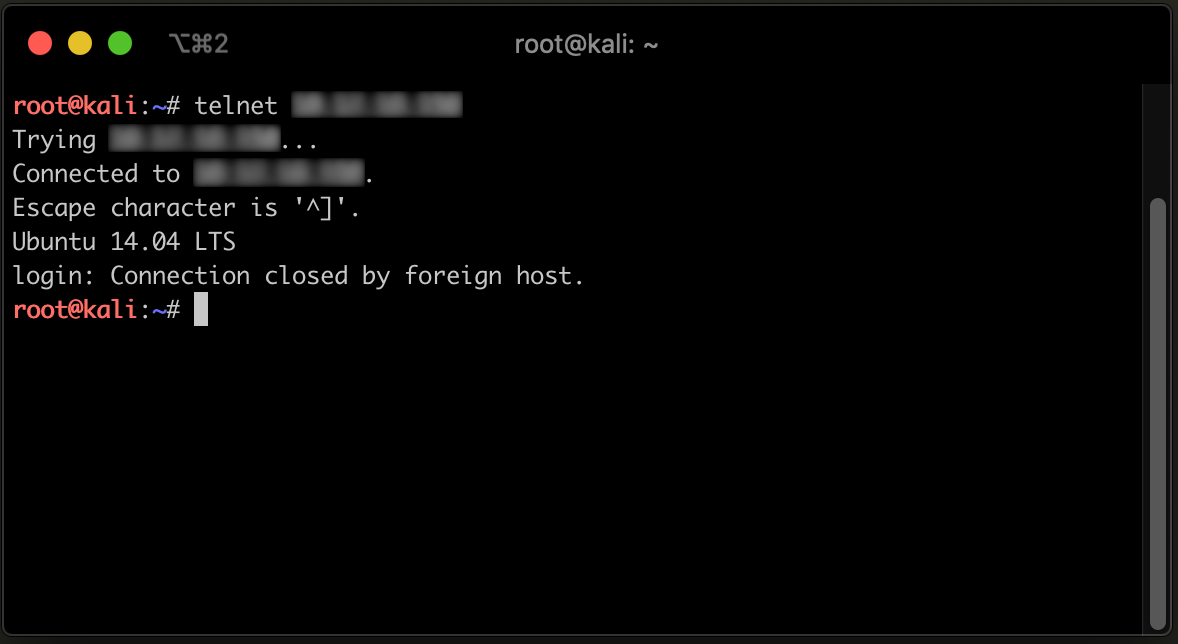
Now that the program is running, lets use our local machine and attempt to connect to it with a telnet client:

As we can see, our telnet client successfully connected to the honeypot, and we were prompted for credentials to login as expected! To the naked eye this appears to be a legitimate telnet service.

The console running our honeypot indicates that a connection was established!
Managing alerts with Graylog
We can see that the honeypot is working. However without a way to notify us that a connection has occurred, it doesn’t do us much good. Our honeypot is designed to simply echo the connection attempt to a log server over TCP. This gives us a lot of flexibility on the back end solutions we can use to manage our alerts. Virtually all modern SIEM and log platforms can accept raw TCP data as an input. For this demonstration we are using a program called Graylog to receive the data, and notify us that an intrusion has occurred.
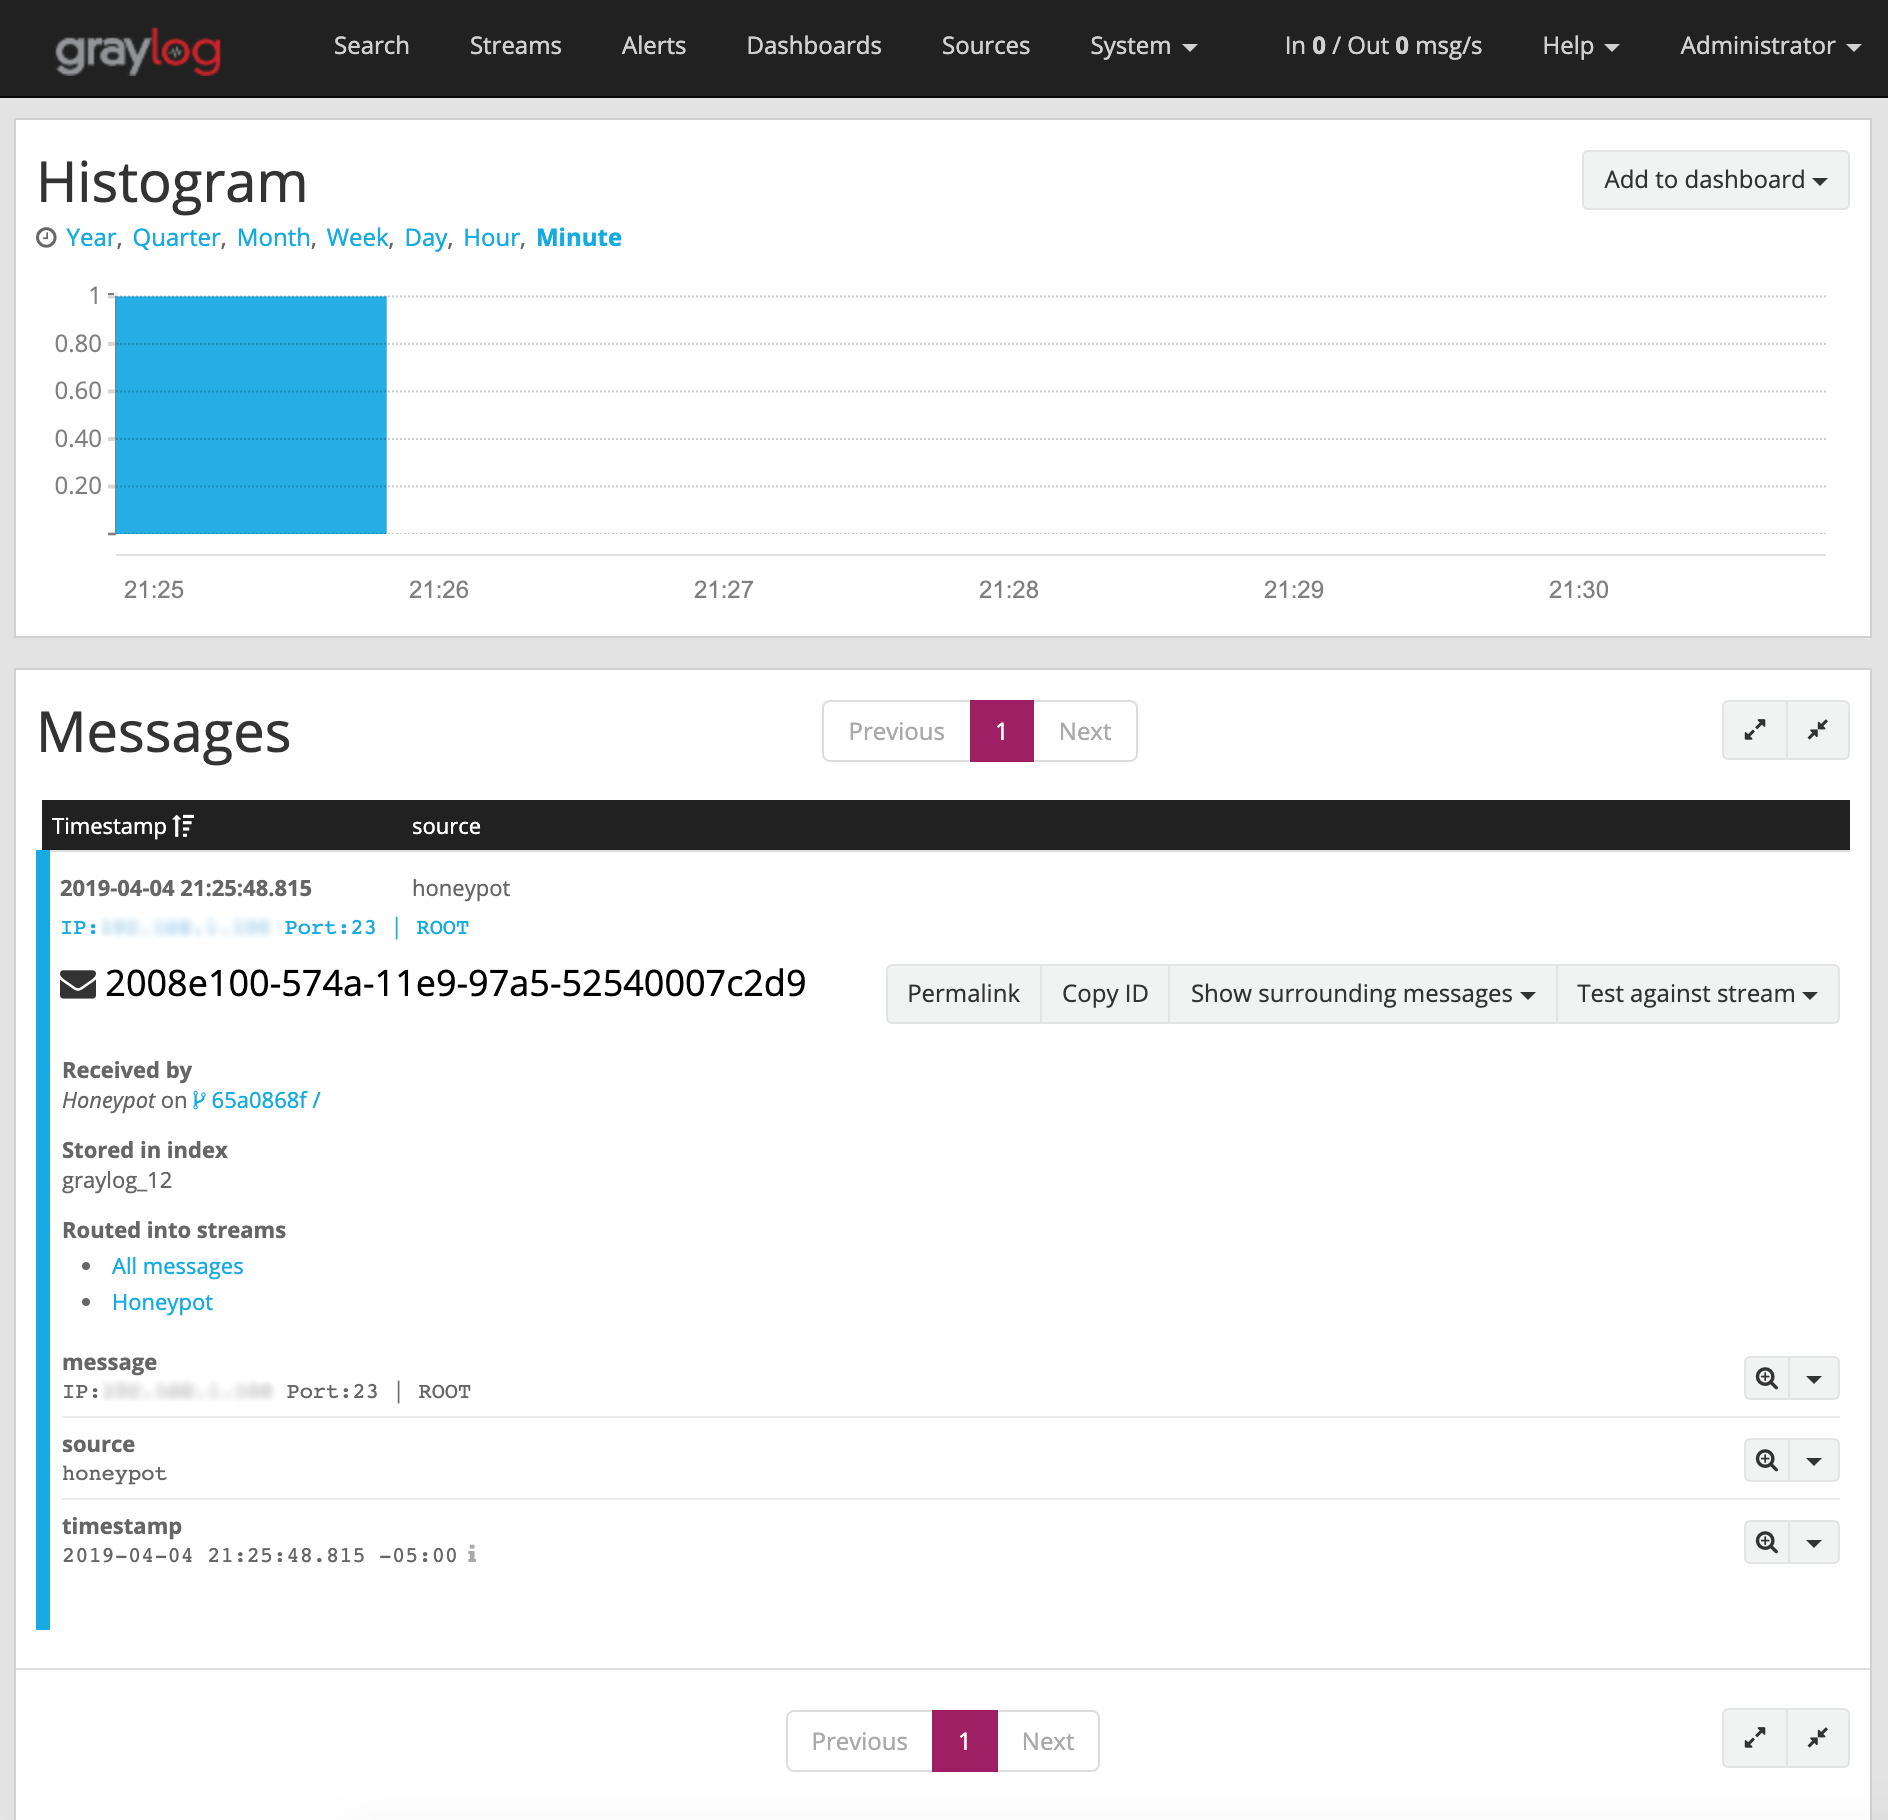
Setting up Graylog is very simple, however it is out of scope for this article. Please refer to the documentation here if you are interested in trying this solution. An example of an event generated by the activity above can be seen in the screenshot below:

By configuring an ‘Alert’ in Graylog based on this activity, we can tell Graylog to notify us when an event has occurred. Graylog can send notifications to an email address, or another application for proper triage.

More examples
We’ve seen how simple it was to simulate the telnet service. Lets use our honeypot to simulate another common service, FTP!
# Local IP/Port for the honeypot to listen on (TCP)
LHOST = '0.0.0.0'
LPORT = 21

# Remote IP/Port to send the log data to (TCP)
RHOST = '192.168.1.210'
RPORT = 9000

# Banner displayed when connecting to the honeypot
BANNER = '220 ProFTPD 1.2.8 Server\nName: '

# Socket timeout in seconds
TIMEOUT = 10
Notice we only had to change 2 of the above variables to simulate a completely different service. We changed the LPORT value to 21, the common port for the FTP service. We also changed the banner to reflect the value transmitted by the program ProFTPD version 1.2.8. This particular version contains known vulnerabilities, and would surely be a prime target for an attacker that gained a foothold on our network!

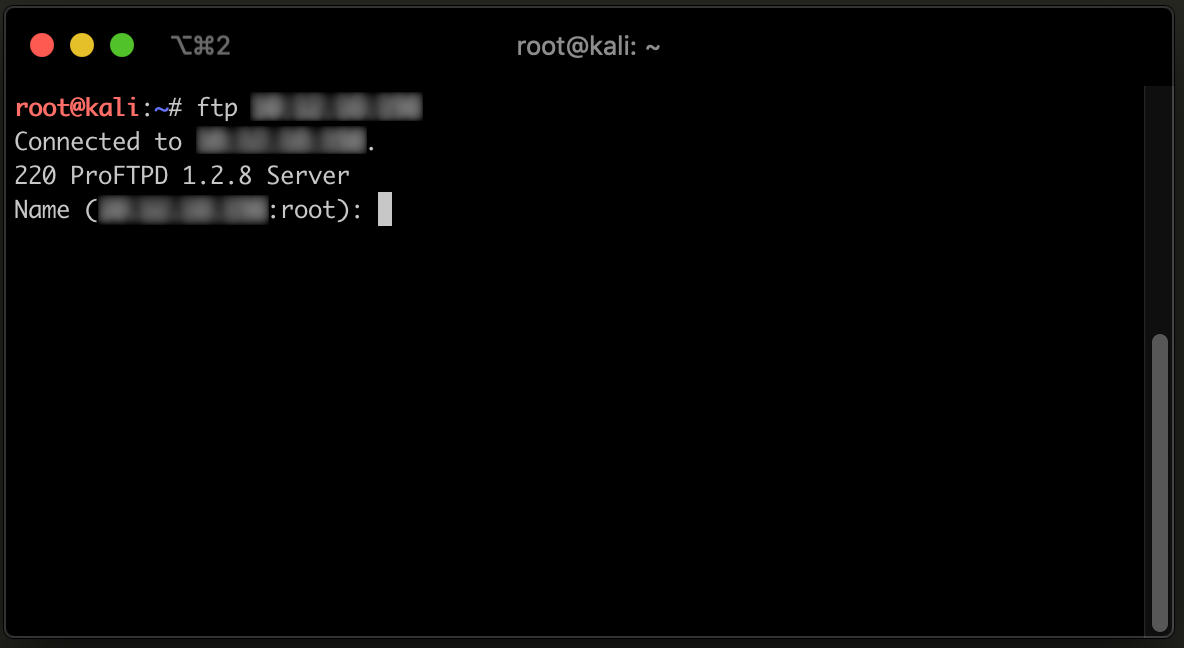
As we can see above, we were able to connect to the service using an FTP client, and fool the end user into thinking this was a legitimate service by spoofing the banner!
Lets try another example (without an initial banner) and simulate an HTTP server:
# Local IP/Port for the honeypot to listen on (TCP)
LHOST = '0.0.0.0'
LPORT = 80

# Remote IP/Port to send the log data to (TCP)
RHOST = '192.168.1.210'
RPORT = 9000

# Banner displayed when connecting to the honeypot
BANNER = ''

# Socket timeout in seconds
TIMEOUT = 10
If we connect to port 80 using our web browser, we can see that a page is not served, as we did not respond to the initial GET request sent by the browser:

The GET request transmitted by our browser contains some valuable information that could be used during incident response.

Conclusion
Hopefully this example has demonstrated how simple it is to create a very low interaction honeypot. This example is far from a perfect honeypot solution though. For example:
Connections are not handled asynchronously. This means that if another person connects while a connection is already established, it will be blocked.
Only an initial banner is transmitted. While this is sufficient for the purposes of triggering a connection alert, it will not slow an attacker down much. Once they realize they cannot properly interact with the service, they will likely move on to other targets in your network.
As an exercise to the reader, can you identify any ways to improve the shortcomings of this script? A cool idea would be to interact with a firewall API, and auto-block users who connect to the honeypot! Feel free to share your ideas and solutions with me!
I hope you enjoyed reading this!
Please feel free to connect with me on social media, it’s always great to collaborate with other infosec professionals! If you found this information useful, I would greatly appreciate skill endorsements on LinkedIn!